Wednesday, February 4, 2015

DIY Pet Stairs

If you  read my last blog post about adopting my puppy Bexar you read about how we rescued him from the shelter. As he's grown bigger we've noticed he has a limp when he walks and can't jump very well. He has a large scar on his inner leg from a previous injury. He loves to cuddle in bed but unfortunately he's gotten too heavy for me to lift.

 My finance Johnathan and I went looking for some pet stairs to put at the end of our bed so Bexar is able to easily climb up. We checked several stores and couldn't find any so we decided to take the weekend to build our own.

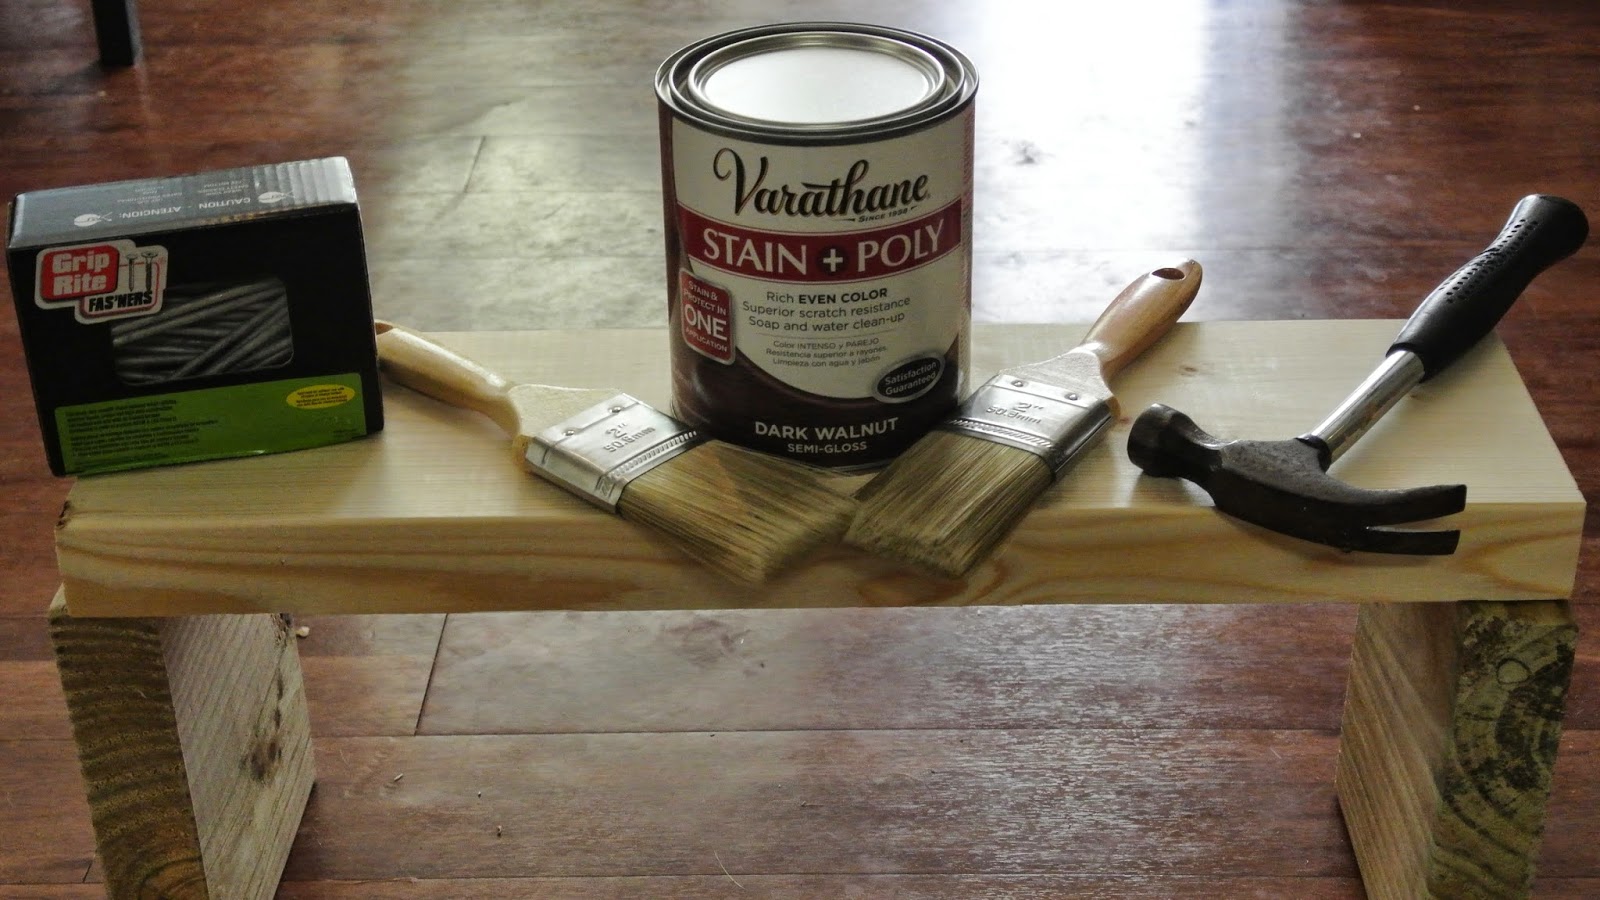
We measured the height the bed to determine how tall we would make our stairs. Then Johnathan designed them on the computer using his engineering program software. By designing them on the program he knew exactly how many pieces of wood we needed and what size to get them cut to. We headed to home depot and picked up our wood, sand paper, paint brushes, nails, and wood stain. 


 Johnathan got started on the project right away and sanded down all of the wood pieces. He then nailed them together piece by piece until the steps were constructed. I mostly watched through this process, I'm not very good with a hammer and nails but I was ready when it was time to stain.


 We stained three coats, letting each layer dry for an hour before starting the next.

 The final product looked better than either of us thought it would and it was a lot of fun to make too. Bexar was unsure of the stairs at first but after about a week he figured them out and now he runs up and down all day!

Tuesday, February 3, 2015

Adopt Don't Shop!

How One puppy Changed my Heart Forever

A few months ago I decided I was ready to get a puppy. With all of the stress from college I was looking for a health outlet and something to focus on when I needed a break. My heart was set on purchasing a Maltipoo puppy. A maltipoo is a poodle - Maltese mix. I fell in love with their tiny stature and their size was perfect for my apartment. Not having much money I poured over craigslist ad's and finally came across an adorable puppy I could afford. I contacted the phone number on the advertisement and the woman who answered the phone agreed to meet me that day. I inquired several times for her address but oddly she never gave it to me and we agreed to meet in a McDonald's parking lot. I was a little suspicious but I could understand her wanting to meet in a neutral location. I've never purchased a puppy before so I didn't know the right questions to ask when she arrived with the puppies. She brought three puppies with her to the meeting and I chose an adorable female. I asked her if the puppies had received any shots and she gave me a wrapper for a Parvo shot she claimed to have administered herself. I gave her the $300 cash we agreed on and she sped off in her car without even counting the money. This is when I became worried. 

I named my new puppy Nala and took her home with me. When I arrived back at my apartment I fed her dinner and she scarfed it down. I put down some pee pads I purchased and I could already tell she was a smart puppy because she already knew how to use them. Our first couple hours together she was running around, exploring my room, and playing with her toys. Then she started vomiting. She vomited sbout once and hour and then started having bloody stool has well. As soon as my fiance got home from work that night we rushed her to the emergency vet. The vet tested her for Parvo and sure enough the test was positive. I was devastated, all I could do was cry, and I felt like it was my fault for purchasing the dog. We admitted her to the hospital right away for treatment. 


Being college students we couldn't afford her bill out of pocket so we had to get a credit card. Her vet bill was around $1500 and  she was in the hospital for 5 days. I called several times a day to check on her and I just wanted to be reassured that she would survive. After 5 days the vet said she needed to stay longer but we could no longer afford it so they sent her home with medicine. We stayed up with her around the clock force feeding her chicken and Gatorade. We kept her wrapped in warm blankets and made sure she was as warm as possible. The next day things took a turn for the worst and she started having seizures and could no longer stand or walk. It broke my heart to watch her suffer. I tried contacting the lady I purchased her from to let her know the other dogs could be infected but she never returned any of my calls or texts. She was only a pound and her tiny body couldn't keep up much longer. She passed away two days later. I watched her take her last breath and that was something I never could have prepared myself for. 

For a few days I just wanted to be alone. I no longer had a puppy and I felt like it was my fault that we were out so much money. I was also angry that I couldn't save her. About a month passed and my heart was empty. My fiance and I agreed to visit the local rescue shelter, San Antonio Pet's Alive, and adopt another puppy. As soon as I entered the puppy room I fell in love with a tiny two month old German Shepard mix named Franklin. He was incredibly lovable from the start. As soon as they took him out of the cage he rolled over for a belly rub. We checked first with the adoption counselor and she told us our home was fine to introduce another puppy to as long as we cleaned thoroughly. We adopted Franklin, renaming him Bexar (Bear) and took him home. 

He was a very curious puppy. I held him on my lap during his freedom ride and he climbed up my shoulder to look out the window. He was shy and skittish his first couple weeks at home. He was generally afraid of men and tried to latch on to the carpet if you picked him up. He also had a ringworm infection and had some bare patches of skin. Bexar slowly trusted us more everyday and I have learned so much from all of the challenges. 

He has brought so much joy to my life these past couple of months. He is incredibly smart and he will ring a bell when he needs food or wants to go outside. He also loves to cuddle with me in my bed. My favorite of all though is when he comes running to the door to greet me, even if I wasn't gone very long. Bexar is now six months old and has come so far since the day we saved his life. I am so happy I chose to adopt and make a difference in his life. So many dogs and cats wait at shelters everyday to be loved. These dogs can make as much as a difference in your life as you can in theirs. Please consider adopting and save a life.  If you would like to see all of Bexar's adventures please visit http://instagram.com/my_teddy_bexar/

Lasagna


Ingredients:
1 lb box of Lasagna noodles
64 oz. jar traditional pasta sauce
15 oz. container ricotta cheese
3 cups shredded mozzarella cheese
1 lb ground beef


Lasagna is one of my favorite childhood recipes. I love to serve this dish with salad and garlic bread. Even the pickiest of eaters can't resist!

Start by greasing a 9x13 baking dish and preheat your oven to 375 degrees Fahrenheit. I prefer to use a clear Pyrex pan but metal pans work just as well. Start boiling water for the pasta in a large sauce pan. While you are waiting for the water to boil you can start browning 1 pound of ground beef in a large skillet.
Once the water reaches a boil place the full box of pasta in the water. Do not split any of the noodles in half. They will shrink as they cook and will fit perfectly in the pan. When your ground beef is completely cooked turn off the burner, rinse and drain, then return to the skillet.  I find it easiest to mix my sauce in with the ground beef. When your noodles are finished boiling turn off the burner but don't drain the noodles. I have found that draining them makes them sticky and hard to work with.

Before you place any noodles in your baking dish line the bottom of the pan with a layer of sauce. This prevents the noodles sticking to the pan. Then line the pan with one layer of noodles. I used a pair of tongs to transfer my noodles from the water. Shake off as much excess water as you can.
Next is the ricotta cheese. Ricotta cheese can be difficult to spread so I mix mine in a bowl with an egg and it is one hundred times easier. Lightly spread over the noodles and then top with sauce and shredded mozzarella. Repeat for three to four layers.

Tightly cover dish with aluminum foil and place on the center rack. Cook for 45 minutes, the last ten uncovered. After removed from the oven allow 15 minutes to cool before slicing.


Wednesday, January 28, 2015

Pompeii
A City Covered by Ashes

While exploring Italy I was lucky enough to visit the city of Pompeii. This ancient Roman city  was buried under volcanic ash due to the horrific eruption of Mt. Vesuvius in 79 A.D. Mt. Vesuvius is located near the bay of Naples and took the lives of over 2000 civilians, burying their bodies and homes, not to be rediscovered until 1748. The archeologists that discovered the remains of the city were very surprised because not only was the city well preserved, so were the bodies of those whose lives were lost. Mt. Vesuvius has erupted over 50 times, but its most recent was in 1944. Geologists say it is the most dangerous volcano in the world and that another Plinean eruption is due any day. Being so close to a very dangerous, active volcano made me extremely nervous to say the least.
Following the eruption Pompeii was abandoned for thousands of years, today the city is a popular tourist destination. There are hotels, restaurants, stores, and an outside market where you can purchase postcards and handmade items.
 My visit to Pompeii included a guided tour through the excavated ruins. We were able to explore the cobblestone lined streets, walk through their homes, and view the ancient artifacts. I have always loved learning about world history in school, but visiting these sites makes the stories come to life. The homes were quite small, and we were able to sit on their beds made of stone. I couldn't imagine sleeping on a stone slab. While looking at the artifacts I was truly amazed at how well they were preserved. We got to see vases, pots and pans, scupltures, and a few of the molds of the bodies burried by ash.

Pompeii was very eye opening and it's a tragedy that a civilization was wiped out for thousands of years. If you get the opportunity to travel to Italy, the ruins are certainly worth visiting.

Friday, January 23, 2015

When in Rome...

My favorite hobby of all time has to be traveling. I love learning about the world around us and immersing myself in new cultures. I have been fortunate enough to be able to travel to Europe twice now and those journeys helped me not only grow as a person, but truly appreciate our earth's beauty. My experience in Rome was both exciting and very education as well. While in Rome I was lucky enough to experience Pope Francis' election and I will forever hold on to the newspaper I purchased in the Vatican that day. While in Italy I came to realize that American's are spoiled because we have the luxury of being able to get by with only speaking English in most European countries. There was rarely a time when anyone I came into contact with did not speak English. Since my trip I have taken a beginners Italian college course in hopes that I will travel to Italy again someday.

The food is probably what I miss most about Italy, Italian cuisine is to die for. What surprised me was that we were served four course meals every night for dinner. We were started off with a salad or appetizer, and then a generous portion of pasta. I was stuffed after having the appetizer and pasta but I figured I could make room for a few bites of dessert. I was shocked when the waiter sat a plate of pork and potatoes in front of me. It smelled so delicious that I couldn't resist. Then of course we were served dessert. If you ever travel to Italy, expect to leave ten pounds heavier, and don't forget to try the gelato. Gelato is the Italian version of ice cream and is topped with fruits, cookies, and candies.  There are so many flavors that it was almost impossible for me to choose. Some gelaterias will even serve your gelato atop a warm waffle. Remember, a gelato  day keeps the doctor away. That's how the saying goes right?
Photo by: Eric Lowe
 One of the highlights of my trip was touring the Roman Colosseum. I had only read about it in textbooks and was fascinated by it's significance to the ancient Roman Culture. The Colosseum was used in ancient Rome as a stadium for games. The most known games were the gladiator battles and the man vs. beast battles. The Colosseum held around 50,000 people. Everything about it was breathtaking and knowing that I was walking in the same place that the gladiators had fought was amazing. Reading about something in a book and actually seeing it through your own eyes are two entirely different things. I'm glad I got to cross this off my bucket list.

Another part of my trip I will never forget was visiting the Roman Forum. The ancient ruins were beautiful and when the sun began to set the view was breath taking.  In this plaza are the remains of ancient government buildings and originally served as a market place for the Romans. It was also used for speeches, elections, and criminal trials. I have so much respect for Rome and how they have preserved their history for the world to experience.


I remember being 13 years old and watching the Lizzie Mcguire movie. That was the day I knew I had to visit the Trevi Fountain someday. The legend is that if you toss a coin over your shoulder into the fountain while making a wish, your wish will come true.  People travel from all over the world in hope of having their wishes granted by the fountain.The fountain is also a popular spot for proposals, but double check that you're tossing a coin into the fountain and not the ring! The Trevi Fountain is beautiful in the day time, but absolutely spectacular at night.

If you are like me and love to travel but have a tight budget I recommend traveling with EF Tours traveling company. EF tours stands for Education First and is a travel agency for high school and college students. My high school worked with EF so that our group was exclusively from my high school. If you are in college or a solo traveler you can browse their website and travel with other students from around the US. Included in the cost of your trip is: meals, hotel stays, transportation, airfare, admission to all planned activities, and a full time travel guide. My trip was between $3000-$4000 so you are really getting a lot for your money. If you are interested in seeing what EF has to offer, here is the link to their website. www.eftours.com                                                             

Sunday, January 18, 2015

Fried Chicken Strips


Ingredients
1 egg
1/2 cup buttermilk
1 cup all-purpose flour
1-1/2 teaspoons garlic powder
1-1/2 teaspoons pepper
1/2 teaspoon salt
1/2 teaspoon paprika
2 pounds chicken tenderloins
Oil for deep-fat frying
2 tablespoons grated Parmesan cheese


This recipe is absolutely delicious and relatively easy. Perfect for picky eaters or kids. If you are using a deep fryer pour the vegetable oil to the fill line and pre-heat to 375 degrees Fahrenheit. If you don't have a deep fryer you can use an electric skillet. In a small bowl, whisk together the egg and buttermilk. Then in a medium sized bowl combine the flour, garlic powder, pepper, salt and paprika. Dip chicken in egg mixture, then flour mixture making sure to coat completely. When the deep fryer is fully heated fry the chicken, a few pieces at a time, for 2-3 minutes on each side or until no longer pink. Drain on paper towels. Sprinkle with cheese. 

Chicken and Cheese Enchiladas


Ingredients:
1 cup chopped onion 
½ cup chopped green pepper
5 Tbsp. butter
2 cups chopped cooked chicken
4 ounce can chopped green chili peppers
¼ cup all-purpose flour
1 tsp. ground coriander
¾ tsp. salt
2 ½ cups chicken broth
1 cup sour cream
1 ½ cups shredded Monterey jack cheese
12 6-inch tortillas (I buy extra because they break easily)

This recipe is a hit in my family and perfect for when you are craving something spicy. Start off by pre-heating your oven to 350 degrees Fahrenheit. Next lightly grease a small baking pan and place your uncooked chicken in it. I use a large boneless, skinless chicken breast. The baking time will depend on the size of your chicken so you will need to periodically check it. Mine took about an hour. I poured melted butter over my chicken before baking it. When your chicken is done baking you are going to melt two tablespoons of butter in a large saucepan and cook the onions and ½ cup chopped green pepper until they are tender. In a medium mixing bowl combine your shredded chicken, 4 ounce can of drained chili peppers, and the cooked onions and green peppers, then set aside. Fill each of the 12 tortillas with a small amount of the chicken mixture and line them in a 9x13 baking dish. In your now empty sauce pan melt three tablespoons of butter. Stir in the flour, coriander, salt, and chicken broth. Cook and stir until the mixture is thick and bubbly. Then remove from heat and stir in the sour cream and one cup of the cheese. When the mixture is fully combined stir in the remainder of the chicken and pepper mixture. Place back on stove top and let simmer for about 5 minutes. Then fill each of the tortillas with the cheese mixture. Be sure to reserve some to pour over the top. Carefully close each tortilla with a toothpick and pour the remaining sauce over the top. Then drizzle with the remaining Monterey Jack. Bake uncovered at 350 for 25 minutes until bubbly. Enjoy!

Bread Machine Buttermilk Honey Bread


Ingredients:
1 cup + 3 Tbsp. Water
2 Tbsp. Melted butter
3 Tbsp. Honey
3 cups Bread Flour
1/3 cup Dry Buttermilk Powder 
1 Tsp. Salt
1 + ¾ Tsp. Bread Machine Yeast

Prep Time: 10 minutes
Cook Time: 3 Hours
Makes: 1 1/2 Pound Loaf
This recipe takes 3 hours in the bread machine so plan accordingly if you are making this recipe to go with your meal. The bread machine also has a cool down time of 20-30 minutes and will not allow you to start another loaf until it is completely cooled down. Keep that in mind if you are making multiple loaves. The machine will cool faster if you leave the lid open after each cycle. 

Buttermilk honey bread is very simple and incredibly delicious. Just a side note before you start placing your ingredients in the pan, make sure the blade is attached in the bottom of the pan. Many times I have loaded in all the ingredients and then noticed I forgot to attach the blade. Add the ingredients to the pan in the order I have them listed. You don’t want the yeast to get wet. With any bread you always want to add the wet ingredients and then the dry ingredients. After you have added in all of the ingredients set the crust setting to light, program for basic bread, and push start. 

Do not stop the bread maker because you will have to start completely over (unless of course the machine is smoking) then you will need to unplug it. When the bread starts to bake do not open the lid because it will fall.  Depending on your model it may have a keep warm feature when the cycle is complete. With my machine it will automatically activate when the cycle ends and last for 30 minutes or until unplugged. If you are not going to use this feature you should unplug your machine and remove the bread immediately. Sometimes the bread is really tricky to remove from the pan. I use a rubber scrapper to loosen the edges and then turn the pan upside down over a plate and gently shake it until the bread comes out. Let cool completely before slicing or removing the blade from the bread(it often comes out in the bottom of the bread). .                                                              


Slice and Enjoy!
                       

Roast Beef with Noodles
A One Pot Meal


Ingredients:
One Boneless Beef roast
Mini carrots
4-5 Red potatoes
½ sliced Onion
5 beef bouillon cubes
Vegetable oil
All-purpose flour
 1 pound of Egg noodles

This recipe is a family favorite. It has been passed down from my great grandmother to my grandmother, my grandmother to my mother, and finally to me. This recipe is relatively easy and perfect for making a whole meal in one pan and not having a ton of dishes to do later. I loved making this recipe in my college dorm because I didn't have a stove top. This recipe is enough for a family of 4-5, but it’s so delicious that my fiancĂ© and I can finish ourselves. I use a round presto plug in skillet (available at Walmart).


First you are going to remove your roast from the packaging and coat each side lightly with all-purpose flour. Heat your electric skillet to 350 degrees Fahrenheit and pour in just enough vegetable oil to coat the bottom of the pan. Carefully place your roast in the pan and brown each side. When the roast is browned fill up a glass of water and pour enough into the pan to be able to cover the roast. Then add four of the beef bouillon cubes. Cover but crack the lid so it does not boil over. Continue to boil for 4-5 hours until the roast is fully cooked. Note that as the water boils off the roast you will need to continue to replace it so it does not burn (this is not a recipe to make while you will be out of the house). When the meat is fully cooked you may add in your potatoes, carrots, and onions and boil for about 20 minutes depending on how tender you prefer your vegetables. When they are finished remove the meat and vegetables and cover them. Then pour the full bag of noodles into the pan. You may need to add some more water to cover the noodles but don’t add too much or they will be runny. Add in your last beef bouillon cube and boil for about another 20 minutes until the noodles are fully cooked. Voila you have a full meal and you only had to use one pan! I like to serve this meal with some homemade buttermilk honey bread (recipe to come) but it is just as good with some fresh French bread from your local bakery. 

College Dorm Essentials


Presto kitchen kettle multi-cooker ™- The presto kitchen kettle multi-cooker ™ is fantastic! I was so glad that I had in my dorm because I wasn't a fan of the on campus dining options and this cooker is very user friendly. You will want to check with your resident assistant before operating it in your room to make sure it's allowed. It’s ideal for a dorm that doesn't have a stove top . didn't enjoy walking to the community kitchen with all of my supplies and sometimes the stove was already being used. 

The Presto kitchen kettle multi-cooker™ is extremely versatileYou can boil pasta, rice, or easily steam a veggie. I have also used my presto multi-cooker ™ as a deep fryer by heating up some vegetable oil. The kettle comes with a basket so you can easily fry up your own french fries or onion rings! It features a non-stick surface both inside and out making clean-up a cinch. You can completely immerse the body of the cooker in a sink full of water as long as you remove the temperature dial, it is dish washer safe as well.  I love the temperature control dial because you can precisely adjust according to what you are cooking unlike the limited options on a crock pot. This was great for when I got tired of eating at the cafeteria every day. Presto ™ even sells a cook book of recipes for the multi cooker if you need some extra inspiration. My favorite recipe of all time to cook with my kettle  is a family recipe called Roast beef with noodles

Computer router- I went off to college without a router because our dorm had wireless Internet available for the residents. Unfortunately my room was a dead spot so if I needed to access the Internet I would have to go to the library across campus.  Personally I am more comfortable doing homework and studying in my room, so it was essential for me to get a router. Once I had a router I could study with privacy in the comfort of my own room and didn't have to walk to the library at night.  It also helps the speed of your Internet because everyone is trying to use the school’s wifi at the same time.
Memory foam mattress pad- Dorm room beds are uncomfortable! Most likely they are several years old and not the best quality. I had many restless nights until I invested in one of these and sleep is definitely essential to a college student. You don't want to be tossing and turning all night if you have to get up early for an exam. Check with your housing complex for the size of your bed because in my room I had a twin extra long mattress and bedding is a little harder to find for that size. Unfortunately I don't have a picture because I gave my mattress pad to a friend when I moved out of my dorm.

Mini refrigerator- I lived in a dorm with three other girls and we had a full sized refrigerator in our shared kitchen. With each of us having our own full set of groceries such as milk, eggs, and butter there usually wasn't much space for anything else. I decided to get my own mini refrigerator to store the food that wouldn't fit in the main fridge or that I didn't want to share.
I would highly recommend purchasing a mini fridge if you don't have a community fridge because you will need a place to store snacks and drinks. No one likes drinking a warm soda in the summer. The freezer is even big enough for a few small containers of ice cream for when you get a sweet tooth. My fiance likes to keep his next to his desk to store his favorite drinks.
Sentry Safe ™ - A small safe is great for storing any important documents such as: your social security card, car title, checkbook ect. Especially if you are sharing a room, you don’t want your roommates  to have access to your personal documents. The safe is fire proof and water proof to protect your valuables during  natural disasters. I love my Sentry Safe ™ because it's very easy to open and there is lots of space for all of your valuables. It features a carrying handle which makes it easy to move and it is small enough to store under your bed or in the closet. They are also very affordable. I highly recommend taking one of these with you to college.  
Brita Water filter ™ - I am a very big water drinker. I try to consume at least eight cups a day and for awhile I was purchasing disposable water bottles for use in my college dorm. This takes up a lot of valuable storage space in your already small room and all of those disposable bottle can start to add up in price. I suggest purchasing a reusable bottle and a Brita water filter™ . I personally don’t like drinking tap water, but didn't have space for all the disposable water bottles or a way to get to the store to purchase a new case every couple of weeks. The Brita water filter ™ filters water quickly and you will have the luxury of clear, clean water versus the hard water from the tap. The Brita water filter ™ has a percentage timer on lid to let you know when the filter needs replaced. My filter usually lasts about three months and they are quick and easy to change out.
Tide Pods ™ - Tide pods ™ were my life saver when I lived in a dorm and had to go to the laundry room to wash my clothes. You are already carrying a full basket of laundry, why make your life harder by carrying a full bottle of liquid detergent? I really struggled with carrying an over flowing basket and a heavy bottle of detergent across campus. And once I finally made it from my dorm to the laundry room I would have to unlock the door with my student ID and get in with all of my stuff before the door locked again. I never knew how much of the liquid to measure out and I always made a mess while pouring it from the cup.I wasted a lot of detergent with all of the spills and then I would have to wipe up the washer and floor. With Tide Pods ™ you can just take one with you, place it in the drum of the washer, load your clothes on top, and choose your settings. No measuring and no mess. The Tide Pods ™ are gel packs and are designed to dissolve in all temperatures. I also liked that I could take a few pods with me if I was doing multiple loads of laundry and hide them under the clothes in my basket. My community laundry room had a lot of thefts of laundry supplies so you would have to carry your detergent back to your room in between loads if you didn't want it to get stolen. Tide pods ™ are great because each individual pod contains detergent, stain remover, and fabric brighter. Just imagine how much easier it would be to carry a single tide pod as opposed to your liquid detergent, stain remover, and fabric brightener. Tide pods ™ come in an array of scents including: Spring Meadow, Mystic Forrest, Ocean Mist, and Free and Gentle.